Showing posts with label recycled. Show all posts

Homemade Scrabble/Boggle Letter Dice Game for Writing, Spelling lesson plans

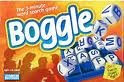
Here's a fun, easy DIY game to make and play with children and tweens to keep reading, writing and spelling skills fresh. I love the word games Boggle and Scrabble in which players make words from random letters. Both Scrabble and Boggle are superb games for spelling and reading practice. Here's a game that combines the scoring of Scrabble with the letter mix-up of Boggle. And best of all, it's easy to make, fun to play, has endless variations and is adaptable. This game can be played in the car, at the store, on a place, while waiting in line; anywhere you go it goes. I call it 'Scraggle'. Here's how to make your own Scraggle game.

You will need

12 dice: Recycle die from old games like Kismet or Yahtzee.
Dice can be purchased at almost any store for under $2).

Permanent markers

Blank stickers (round or square white stickers are best)

Note pad

small pencils

watch or timer

small box


To make Scraggle: (Scrabble plus Boggle)

Affix a sticker to each of the six sides of the die.

Label each die side with a different letter. With 12 dice times six sides you will have room for 72 letters. Since some letters are more popular, label dice this way. It makes no difference where on the dice you put which letters, Just be sure to get this many letters in.

  -four times each, letters: A, E, I, O, U, R, S, T, L, N

  -three times each letters: B, C, D, F, G, H, M, P

  -one time each, letters: J, K, Q, V, W, X, Y, Z

  -dictionary to check spelling


To play Scraggle:


Distribute pencils and pads. Players take turns shaking box with letter dice, to rearrange.

Player open box and make sure all dice are flat and showing letters.

Time players for three to five minutes, to see how many words they can make with letters showing.


Scoring is as follows;


  -3 letter words = 5 points

  -4 letter words = 10 points

  -5 letter words = 20 points

  -6 letter words = 50 points

  -7 letter words = 100 points

  -8 letter words = 200 points

Players should check each others words for accuracy.


Montessori math manipulatives from recycled trash: Easy, free DIY math activities


Educational wisdom says hands-on learning works best for kids. Here are hands-on Montessori math activities using homemade Math Their Way type manipulatives from recycled trash. Make easy, free or cheap eco-friendly math lesson plans for learning centers Homeschool parents, keep Montessori math activities on hand for homework help and summer enrichment. Use these math manipulatives to teach place value, addition, subtraction, carrying, borrowing, multiplication, division, fractions, decimals, percent, story problems, sorting and classifying, even basic algebra. 

Milk rings from recycled trash. Use milk rings in different colors to teach place value. Bundle in groups of ten like Montessori base10 blocks. Teach math operations of addition, subtraction, multiplication and division. 

Twist ties and bread tags from recycled trash: As with milk rings, bundle different colors together to show groups of ten or one hundred. Use like Montessori golden beads. Math Their Way uses milk rings, twist ties and bread tags for place value, sorting, counting and classifying. 

Play dough math manipulatives. Save play dough scraps and give each child a tub. Have students make clay numbers or clay balls to count. Students can also roll clay out and cut with cookie cutters to create shapes, patterns and Montessori style geometric solids. 

Dice math activities: Keep these as car games for math facts practice, homework help or summer enrichment. Play multiplication, division, subtraction and addition games. Shake two die and add, subtract, divide or multiply the two numbers. 

Recycled game pieces. Save old game pieces, bingo or poker chips and game tokens to use for counting, like Montessori Teddy Bear Counters. Play Math Their Way sorting, classifying and organizing math games. Use to demonstrate story problems. Teach ratio, percent and fractions lesson plans. 

Domino math games . Dominoes make great hands-on math manipulatives. Use as car games for homework help and summer enrichment, practicing times tables and math facts. Have students add, subtract or multiply the dots shown on the domino. 

Playing cards. Recycle and repurpose mismatched playing cards as flashcards. Have students play math games like war, only they add, subtract or multiply the cards drawn. These make great car games for homework practice and summer enrichment. 

Stickers for DIY flash cards and math worksheets. Repurpose partially used sheets of stickers to make DIY math flashcards and math problems. Students create math problems by writing numbers on blank stickers. Students can also use picture stickers to show story problems. 

Yarn and straws. Cut straws into equal pieces and have students "string" straw pieces like beads.  Use for counting and patterns, abacus math and fine motor skills practices. 

Beads. String mismatched beads from broken jewelry and use like a DIY abacus, golden beads or base 10 blocks. 

Cardboard. Cut cardboard strips to make rulers for measurement, base 10 bars (like Cuisenaire Rods). Teach place value, geometry, multiplication, division. Make fraction bars and fraction pies from recycled cardboard. Make flashcards and file folder games. Here are some free printables for file folder games. (From ABCs to ACTs blog)

Earth Day recycled egg carton crafts for science games, lesson plans


Earth Day, April 22, is part of the larger Earth Month which focuses on caring for the environment. In Earth Month, the big 3 words are reduce, reuse, recycle. Teachers can demonstrate good Earth Month habits all year long by recycling materials, reusing them as classroom materials and reducing landfill waste. Here are science experiments and science crafts made from recycled egg cartons. Repurpose recycled egg cartons into science crafts and hands-on science games. 

Sensory exploration science games: Students practice sensory exploration using recycled egg cartons labeled with five senses and descriptive words. Sort picture cards or small objects representing items. Use one recycled egg carton per sense. Label with words like these. 

Taste: Sweet, sour, salty, bitter, metallic, tart

Smell: spicy, bitter, sour, soapy, flowery, fruity, moldy

Touch: furry, fuzzy, smooth, cool, warm, hard, rough, scratchy, bumpy, squashy (malleable), sticky

Sound: squeak, ring, buzz, beep, pop, clang, snap, crackle, scrape, scratch

Attribute sorting science games. Label recycled egg cartons with words or pictures of attributes to sort. Tailor science games to unit. Items may be sorted by color, shape, size, living/non-living, animal category, wood/metal/plastic, habitat. Play as a scavenger hunt in which students search for objects to fit each attribute category.

Science vocabulary games: Labeling and sorting materials into recycled egg cartons builds science vocabulary, adjective usage and description. Discuss which items may fit several categories. 

Ecology experiments for Earth Day using recycled egg cartons.

Paper or Plastic? Use cardboard and Styrofoam recycled egg cartons to demonstrate what happens to both in a landfill. Place a piece from each carton in water and soil put them in the window. Note any changes to each over time. Use this to explore biodegradable materials and renewable resources for Earth Month. Discuss how pollution is an environmental hazard and harms plants and animals.

Geology science experiments for Earth Month: Use recycled egg cartons to classify and identify rocks and minerals. Students should label the sections of recycled egg cartons and sort by:

hardness on the MOHs scale

rock type (metamorphic, sedimentary and igneous)

mineral composition (calcite, silicate, carbonate, etc.)

uses (building, abrasion, decoration, chemistry, etc.)

Biology life science games. Label the sections of recycled egg carton science crafts with taxonomy classifications from the kingdoms (plantae, animalia, etc). Students might sort by subcategories KPCOFGS (kingdom, phyllum, class, order, family, genus, species). Students cut pictures or make tiny cards with names of members of various groups. They sort pictures or words into categories. They can test each other in partners or in groups. Label the bottom of the egg carton with answers for self-checking. This can be adapted to any age or grade depending upon what you are studying.

STEM Systems science crafts. Most all science experiments are based on a system or cycle. Use recycled egg carton science crafts to make 3D flow charts or graphic organizers Places objects in each section to represent parts of the cycle and draw arrows to show how they interact. Demonstrate electrical current, the water cycle. food chains, human body systems, habitats, plant development and insect metamorphosis.

Science Timelines. Use a recycled egg carton to demonstrate how things change and develop (or regress) over time. Make timelines of science inventions, transportation, etc. Use this with any area of science that you teach.


Cardboard castle craft project for social studies, medieval history, book-based activities

Here's a craft project that can be used for anything from home, to classroom to youth theater: a cardboard castle. Make it grand enough to grace a stage or simple enough to stow in the closet for children's rainy day fun. Create one for preschool learning centers or high school history projects. This castle project makes a perfect complement to medieval social studies units. It can be a book-based literature response activity or book report alternative.

To start, make cardboard castle walls. Cut open two large, recycled cardboard refrigerator boxes. Tape two boxes together to make an octagon castle "keep." Cut cardboard castle battlements. Castle walls had a series of crenelations and merlons (squared edge thingys) along the top. Here are free printable patterns for medieval crafts and castle design ideas. Cut cardboard castle keep windows: Draw a four-pane window and cut openings.

Decorate recycled cardboard castle. Draw in bricks and a medieval family crest. Cut a drawbridge opening in the side of cardboard castle. Attach yarn to both sides of to lower and raise drawbridge. Cut holes in the top to tie drawbridge closed when the royal inhabitants aren't receiving company. Place blue blankets around the outside for the castle moat. Fill with stuffed animal dragons, fish, alligators and other aquatic creatures.

Make flags for cardboard castle. Royals had ancient family crests that symbolized their clan. These were placed on banners flown when the family was in residence. Banners were carried standards into battles. Have kids design their royal family crest. Here are free printable heraldry stencils for medieval crafts for kids. Make banners on squares of fabric cut from old bed sheets or towels. Draw or paint crest using permanent marker or fabric paint.

Make secret entrances for your recycled cardboard castle. Line chairs up to make a crawl-through tunnel entrance into castle. Drape sheets, blankets and bed linens over tunnel. Establish a
dungeon. Make a parapet (walkway) by placing several chairs or a bench along the inside edge of the castle. Soldiers keep lookout here and send prisoners to sit under the chairs in the dungeon sit under bench. Fashion a turret. Put a collapsible net laundry hamper upside down on a
chair inside the castle. Children crawl into hamper and onto chair to look out of the turret.

No Roses for Harry Recycled Yarn Craft, Book based Snacks, Printables

Are your kids going winter stir-crazy? You need a craft afternoon. I learned as a teacher/homeschool mom to make lesson plans hands-on. My craft parties include an interactive story and snack and lots of free printable book-based activities. 

One of my husband's favorite children's literature characters is Harry the Dirty Dog, created by Gene Zion and drawn by Margaret Bloy Graham. There are several books featuring Harry the Dog. My mom described a yarn bush she made for the birds and it reminded me of Harry. Here are activities based on "No Roses for Harry."


Story Party Book Activity: Read "No Roses for Harry" in ebook online at Open Library. You can hear an audio reading on Youtube. Pause the story at various points and encourage children predict what will happen next. Let children color these free printable Harry the Dirty Dog coloring pages, make a booklet and retell the story. Here's are printable No Roses for Harry coloring pages

Story Party Science Activity: Make a yarn bush. Gather up recycled bits of string and yarn. Place them in trees and bushes for the birds to use in nest building, like the bird did in "No Roses for Harry." Look for your yarn in bird's nests. My mother says her yarn has been disappearing, so she knows the birds are nesting. You might get a bird guide and ID the birds you see in the yard. 

Story Party Recycle Bin Craft: Teach kids divide by 2 by braiding yarn. Wind yarn braid into a concentric circle Sew a few stitches to hold it together and you have a recycled craft pot holder. These are great for preschool crafts. If you are crafty like Grama in "No Roses for Harry" teach children simple finger knitting or use large blunt needles. Let them knit a washcloth. 

Story Party Math Craft. Use this free printable rose pattern to make paper roses. Teach about spiral patterns. 

Story Party Snack: Make "roses" by spreading cream cheese on a scallion, pickle spear, carrot or celery stick. Wrap a slice of ham or other lunchmeat around it. Cut radish or tomato roses. Make open face jam sandwiches cut in flower shapes. Make flower shaped pancakes. 

Story Party Math Craft Snack: Make flower cookies. Roll sugar cookie dough in little balls. Arrange four in a square or five in a circle. Bake and frost. Decorate with candy sprinkles and an M&M in the center. Decorating cookies is a great preschool craft snack!  

Warm up after snow day play with cocoa cookies and more Harry stories! Or cool down after summer play with lemonade and Harry the Dirty Dog, Harry and the Lady Next Door or Harry By the Sea. 


Recycle Bin Crafts for Bored Kids: Homemade Hats for Learning Centers


So this Covid 19 quarantine is getting long, huh? A lot of you parents got thrust into the role of teacher unexpectedly. If you're homeschooling children, maybe you need my teacher mama first aid kit, with quick, easy CHEAP ideas to perk up the school day. 

Just in time for earth Earth Day on April 22, how about recycle bin trash craft? Homeschoolers and teachers, your recycle bin in your best craft supply resource. Let kids repurpose, recycle and reuse household stuff in science projects and eco-friendly crafts.  

Today's recycled trash crafts feature homemade hats for kids! The prototype was developed by our oldest daughter at 20 months old. We kept her toys sorted in recycled 5 pound peanut butter pails. One day, Little Miss emptied one, plopped it on her head, tucked handle under chin and voila—an instant helmet. Then she proceeded to saddle up and ride baby brother like her noble steed! I removed the bucket handle for her safety and her from brother for his. 

But I realized what really cool homemade hats for kids can be made with a little repurpose and reuse. Let kids sort through your recycle bin for plastic ice cream buckets, butter tubs and coffee canisters. Organize by size.  This is a great way to teach preschool sorting, measurement math and Earth Day environmental science. 

Make helmets for hands-on social studies crafts. Repurpose and reuse recycle bin milk jugs as knight's helmets. Remove handle, cut a flap to use as a helmet visor. Cut a piece of plastic and attach with brads to make a visor flap. Wrap in aluminum foil for an armored helmet. Explore the history of helmets and armor with these free printable coat of arms activities from Pinterest. 

Teach STEM lesson plans making homemade hats for robots, soldiers, aliens, animals, astronauts. Make homemade crowns for kings and queens and princesses (cut both ends out to make cylinder shape and decorate. Here are free printable paper crown patterns too. 

Make cone-shaped medieval lady hats for kids by rolling a square of paper in a funnel shape. Trim edge even. Staple recycled crepe paper streamers to hat. Cut decorations from recycle bin stuff. Repurpose and reuse old headgear in cute homemade hats for kids costumes. Repurpose and reuse silk flowers, fabric scraps, ribbons, yarn, buttons, appliques, and faux gems as decorations for your recycled trash crafts. 

Earth Day recycled trash crafts: Cross-curricular Cellphone Cases

Looking for jazzy recycled trash craft projects for Earth Day? How about homemade cellphone cases? You can pick up cheap cases for iPhone or Android and decorate them. Empty the recycle bin and let students create mosaic or patterned cellphone cases from recycled trash. Make cross-curricular crafts. 

Math crafts: Make tesseracts, mosaics, 3D images, spirals (to teach Fibonacci numbers) and other mathematical patterns. 

History and social studies crafts: make cellphone cases with timelines, statues of famous people, Egyptian scarabs or jeweled reliquaries. 

Geography crafts: Draw maps on cellphone cases. Create your own treasure map! 

Literature crafts for lesson plans: Make a cellphone case that resembles a book, or index from card catalog. Choose a favorite book and make cellphone cases on that theme. This could be an extension for hands-on book reports. 

These Earth Day recycle bin trash crafts are perfect for interactive art lesson plans too. 


Homemade, Recycle Bin Shoe Box Dioramas, Miniatures, Props with Free Printables

Does this scene sound familiar in your home? It's 8 pm and darling daughter is wailing. She forgot to make her school shoebox diorama project due TOMORROW! Been there done that. I wanted to say "tough luck. Take the F" (which she deserved). But being a forgetful, eleventh-hour girl myself, I confess, I empathized. So I bailed her out. The whole family helped. We made an awesome woodland Native American shoebox diorama with recycled trash and household stuff. 

For homemade shoe box dioramas for any content area, all you need is a recycle bin, craft scraps, household junk and a little ingenuity. Here are free printable dollhouse miniatures and free printable habitat diorama backgrounds. I've included free printable scale model building patterns too. 


* Backdrop. Stand shoe box upright inside box lid. Get little-miss-last-minute busy drawing background inside lid (or on plain paper to attach to lid. Our shoebox diorama required an eastern woodland background. For a science habitat diorama, draw a nature scene. For English literature, create a scene from book. One son made a baseball field for a shoebox diorama from "The Chosen." Glue on cotton balls for clouds. Tape tinsel to box top for rain. 

* Buildings. Make 3-D house from smaller box. For 3-D yard or city scene, cut boxes and attach small portions to sides. Make a row of different sizes boxes for city. Cut doors to open. Decorate as house, church, store, office building, school. We made a longhouse from a butter tub. For a tipi, use a paper cone or cup.

* Furniture.  Use dollhouse furniture. Cover small boxes with fabric, wallpaper or wrapping paper for couch, table, bed or chairs. Cut chairs from cardboard. 

* Figures. Use action figures, dolls, Fisher Price or Lego people or Polly Pockets. Or draw face on round-head peg clothespin, pencil or toilet paper tube. Bend pipe cleaners or twist ties into dolls. Add wooden bead for head or paper face. Stuff a glove. Tie with yarn to make arms from outer fingers, legs from middle, head from thumb. Wrap dolls in scrap fabric or colored paper for clothes. Tie. Glue yarn, twine, plastic or paper scraps for hair. 

* Props. Use game pieces, toy sets, doll and action figure accessories, building sets, miniatures. Postage stamps and stickers make rugs, pictures, decorations. Roll paper strip and tie with yarn for scroll or diploma. Tiny yarn balls, beads and marbles make fruit, balls, rocks, cannon balls. Lids, pill bottle covers and tube caps make glasses and dishes. Thimbles and spools are buckets, hay bales, workshop accessories. For our native American shoebox diorama fire, we used broken pencils as logs and orange and red clear plastic for fire. Cut props from cardboard. Staple fabric scraps for curtains, blankets, doors. 

* Landscape. Use small branches for trees. Draw a"garden" on brown fabric or use striped material. Cover little boxes and pill bottles with fabric, grey for rocks and brown for hills, blue for water. Make paper trees and plants from paper tubes or straws. Use plastic toy animals for farm or nature scenes. 

* Military. Use vehicles, weapons and equipment from toy soldiers or GI Joe sets. Make bandages from brown grocery bags colored red (I used this in my Crimean War diorama from "Lady of the Lamp" in 6th grade). Drape material over tripod of sticks for tent. 

Make shoebox dioramas for literature, science, history or social studies crafts. 

Mask Making Crafts for Social Studies

Mask lore is fascinating and tribal masks are significant in many world cultural traditions, religious activities and ceremonial dances. Ceremonial tribal masks are important in Native North American, Central American, South American, Pacific Islander, Asian, African, Maori and other tribal groups. Here are several social studies activities on mask-making and recycled trash mask crafts to help students explore the tradition masks. 

Paper plate, paper bag or Styrofoam mask crafts are the easiest. Use mask-making lessons in preschool through high school social studies activities. Mask crafts incorporate green, recycled trash materials. It may seem odd that tribal masks of such significance could be made from recycled trash. But it's important to stress in social studies activities that most tribal masks are made from just that--"found" materials, scraps and natural elements. The gorgeous collection of African tribal masks at the Detroit Institute of Arts are made from leaves, grass, mud, clay, pebbles, shells, animal fur, skin and hair, human hair, seeds and nut hulls. It the artisan's ability to create beautiful mask crafts from found objects that makes mask-making so fascinating. 

The teacher's role in mask-making social studies activities is facilitator. She provides recycled trash, art supplies and found objects for mask crafts. Students bring the creativity. For preschool mask making, adults might draw eye and mouth holes on mask crafts for kids to cut. Older students should be left to explore different facial features, eye hole and mouth hole designs for their tribal masks. They might decide to shape mouths and eyes like stars, squares or diamonds. They might make animal head mask crafts (a common design in tribal masks). They create teeth, hair, skin, fur or scales. 

Here are art supplies and recycle trash needed for mask-making social studies activities. recycled paper or Styrofoam plates, large paper grocery bags, turned inside out to hide advertising print hot glue guns, school glue or Glue Dots. Glue dots are extra tacky, easy to work with and reduce mess by pricey. If glue dots are too expensive, school glue will work. Use up leftover school glue by melting in microwave to remove from bottles. recycled pot pie tins or egg cartons for glue and paint holders and mask-making details. You'll need Q-Tips cotton swabs, tape and staplers. 

Mask decorations from recycled trash or found objects include --old jewelry --craft feathers --beads, glitter --appliques --faux gems --animal feathers --pebbles --shells--assorted dried seeds, beans, popcorn and legumes (these make excellent teeth) --assorted scraps of yarn, twist paper, twine, raffia, straw, reed, strips of paper or plastic, string, scrap electrical cord, wire for hair (unravel recycled knitted garments for curly hair) --fabric scraps --tissue paper, wrapping paper, construction paper and magazine scraps --gift ribbons and bows --assorted recycled pom poms, tassels, buttons, ribbons, --paint or markers (don't allow students to simply draw a design; encourage them to create a 3-D mask with found objects) --plastic mesh from orange bags (excellent for decorating) --recycled trash container lids, milk rings, small lids, jar lids, cardboard scraps (nothing sharp and all thoroughly washed) --clay or play dough: mold into embellishments and decorations, allow to dry, glue in place, paint.

Provide pictures and examples of native tribal masks. Encourage students to choose a basic mask theme (animal, facial expression), sketch it out and create pattern using a collage of materials. 

Homemade Cardboard Sink and Refrigerator for Preschool Practical Life Learning Centers

Homemade Cardboard Play House Furniture and Appliances: Sink and Refrigerator 

When I was young, my parents made an entire play house for me from recycled cardboard boxes. You can use your recycle bin to make a cardboard house for homeschool or preschool learning center. Here's a tutorial for homemade child sized sink and refrigerator. 

To make these easy cardboard play appliances in less than an hour, you will need cardboard boxes, box cutter or sharp scissors, permanent marker, plastic dishpan or tub, duct tape or box tape and two pump dispensers from soap bottles. 

To make a play sink, tape a cardboard box closed. Cut slits in the box. Insert a small plastic dishpan or tub like hospitals send patients home with. Push tub down into the hole you cut. Cardboard frame will hold the tub in place and create a 'sink'. 

Make faucet, spout and handle for your play sink from two recycled dispenser bottles. Foaming hand soap dispensers look the most realistic. Cut small holes in the back of the box sink. Drop dispenser pieces into the holes so that just the top pump part shows through. Tape inside box so it doesn't wobble. Children can pretend to run water by pressing pump dispenser. 

Or make pretend handles. Make discs of cardboard, clay or cork. Cover with duct tape. Punch hole in center. Insert old pencils or straws. Cut a hole in the back of the cardboard near faucet. Insert straws/pencils and tape to back inside of box. Label "hot" and "cold." Rotate discs like knobs. Place recycled dish soap bottle on sink.

Use a tall rectangle box placed upright for refrigerator. Duct tape pieces of cardboard to make a shelves. Place an old plastic dishpan or plastic box in the bottom for a vegetable drawer. Cover all cardboard surfaces with contact paper and seal edges with duct tape so cardboard appliances last longer. Place small clothing rack near the play kitchen to hang aprons and chefs hats. Dress up is essential in child's play. 


Recycled Cardboard Play House for Preschool House Area Learning Center

Easy, DIY, Recycled Cardboard Play House for Preschool Learning Center Practical Life Area   

Preschool children are wonderfully imaginative. If you give them an old box and tell them to pretend it's a car, they will enjoy hours of fun in their Maserati. Kids don't need expensive playhouse to have fun. You can make a recycled cardboard playhouse easily. In fact, teachers and parents, you can create entire Montessori preschool practical life learning centers for home or school, with just a refrigerator box, available in dumpsters behind appliance stores.

First a word on the refrigerator box--it's a wonderful tool for Montessori preschool play. It's green, versatile, sturdy enough for children to play in and recyclable when you're finished with it. My father made me an entire cardboard playhouse full of furniture, with recycled cardboard boxes. Here's how to make a cardboard playhouse for Montessori preschool practical life learning centers. First, cut the refrigerator box along one of the long edges. Now open the box and flaps of both ends. Place refrigerator box upright around one corner of the room, flaps toward the floor. Alternate flaps, one in, then the next facing outward (to form a base). Arrange the cardboard playhouse so that it encloses the corner. Invert refrigerator box so printing faces inward. Duct tape edges of cardboard to the walls and tape flaps to floor. This is not meant to be a permanent structure; but the tape will prevent the cardboard box wall from collapsing. There is no need for a roof or ceiling. Children understand the concept and will be able to imagine a ceiling.

Cut a window or two in the sides of the box. Cut window panes and curtains and color them in. Or staple scrap fabric to make curtains. Draw a flower box on the outside or make a little rack to place real plants. Cut a door that opens and closes or cut a doorway and hang a piece of cloth like a curtain. Place green and brown towels along the bottom of the cardboard playhouse to look like earth and grass and to mask the edges. Inside your Montessori preschool practical life learning centers, place a doll cradle with assorted dolls, child-sized table and chairs, with play kitchen furniture, play food and dishes and house area costumes. Make recycled cardboard appliances. Set up artificial trees and flowers to lend verisimilitude. Inside the house, put a basket of books that pertains to the subject you're studying. Add comfy throw pillows. This makes your Montessori preschool practical life learning centers into a quiet reading or library learning centers.

DIY Scrabble/ Boggle Letter Dice for Word Games

To make your own Scrabble or Boggle dice, you'll need 12 dice: Recycle die from old games with lost pieces. Look for old dice games like Kismet or Yahtzee at garage sales. Ask a handy man to cut small dice cubes from scrap wood. Dice can be purchased at almost any store for under $2).
Permanent markers
Blank stickers (round or square white stickers are best)
Note pad
small pencils
watch or timer
small box

To make Scrabble/Boggle dice
Affix a sticker to each of the six sides of the die.
Label each die side with a different letter. With 12 dice times six sides you will have room for 72 letters. Since some letters are more popular, label dice this way. It makes no difference where on the dice you put which letters, Just be sure to get this many letters in.
  -four times each, letters: A, E, I, O, U, R, S, T, L, N
  -three times each letters: B, C, D, F, G, H, M, P
  -one time each, letters: J, K, Q, V, W, X, Y, Z
  -dictionary to check spelling

Recycled trash gift crafts, picture frames for Earth Day or Mother's Day

Need inexpensive Mothers Day gift crafts for kids to make? How about recycled trash gift crafts for Earth Day? Or homemade math craft projects with lots of measurement activities? Repurpose and reuse recycled trash in homemade photo frames and spend next to nothing! 

Materials for Earth Day trash crafts or Mothers Day picture frame crafts for kids 
--cardboard boxes from cereal, pasta or any other similar sized box For lesson design, divide students into groups and give each student in each group a box of the same size. The groups can problem solve and work interactively to measure the dimensions for the frame. 

--recycled trash wrapping paper or wallpaper scraps  
--sharp scissors or paper cutter for older students 
--glue wash (school glue watered down) in containers from recycling bin (Styrofoam trays, pie tins, yogurt cups, etc.) for wrapping paper. 
--invisible tape for wallpaper. 
--small foam brushes or paint brushes (for wrapping paper)
--recycled trash refrigerator magnets or tabs from soda pop cans 
--hot glue gun 
--photograph of each child 

Directions for Mothers Day gift crafts for kids 
--Measure photograph dimensions 
--Measure and cut a window in the cardboard which is 1/2 inch smaller all the way around than the picture. 
--Cut out a frame around the window which is about 2 inches wide. 
--Choose a piece of wrapping paper or wallpaper to cover the cardboard picture frame crafts. --Cut the paper so that it is 1 inch larger all around than the frame. 
--Center the paper over homemade photo frames and make a small slit in the paper over the opening. --Cut to enlarge the hole and form a rectangular hole in wrapping paper, an inch smaller than the hole in the cardboard. 
--Cut one inch diagonally from each corner of wrapping paper. Gently fold the paper around the outer and inner edge of the frame to the back. 
--If you use wrapping paper, decoupage it: Apply a coat of glue wash to affix the wrapping paper. Cover homemade photo frames with a layer of glue wash to make them shiny and protect them. If you use wallpaper, simply tape paper in place. 
--With masking tape, attach the photos to the back of picture frame crafts, with image facing out. 
--Attach a piece of paper over the back to hold the photo in place and center it inside picture frame crafts. 
--Hot glue magnet or pop can tab to the back of the frame. You can use peel and stick magnet strips 

Celebrate Earth Day with these recycled trash crafts. Give inexpensive, handmade gift crafts for Mother's Day, win-win! 

Free Marketing Lesson Plans, Science Inventions

Looking for a way to teach marketing and business in elementary school, middle school or high school? Here are cross-curricular business math lesson plans with recycling connections. Use these business math lesson plans to teach environmental science in Earth Month. Students design, manufacture and sell inventions made from recycled materials. These marketing lesson plans are perfect for school, homeschool, 4H clubs, scout troop merit badges, Destination Imagination (DI) teams and Junior Achievement clubs. Plug business math lesson plans into a science unit on technology or simple machines. Tie in activities on inventors for social studies, history and biographical literature lesson plans. Of course marketing has plenty of business math and consumer math applications too. These marketing lesson plans include a component on advertising which addresses design, writing and public speaking activities. . Here is a scope and sequence for each content area. This lesson covers the higher order thinking skills of analysis, application, synthesis and evaluation.

Cross-curricular lessons plans: Graphic Design: The student will design and sketch a product or tool of his own invention.

Cross-curricular Science Technology: The student will plan, organize and build products or inventions using only materials found in a recycle bin. Make these in Earth Month to reinforce eco-friendly design. These may be primary inventions (for example, a hand can opener) or secondary inventions (a development or improvement on primary inventions, for example an electric can opener.) All inventions or products should be creative or unique in some way.

Environmental science: The student will create inventions using only found, reclaimed, repurposed or recycled materials. Students might clean up the playground or empty recycle bins for Earth Month.

Art: The student will decorate or embellish the invention to make it more aesthetically pleasing and marketable. She will also design promotional materials--posters, flyers, product commercials or bill boards. Promotional materials should be made from recycled materials for Earth Month.

Literature: The student will choose an inventor in history to profile. TSW read a biography or autobiography on his inventor and explore the inventor's background and body of work. Ideally the inventor would somehow be associated with the type of invention that the student is creating.

Social studies: The student will develop a poster, timeline or DVD or presentation showing how other variations of her products or inventions have been used in history or around the world.

Writing: The student will write a short one minute commercial advertising her product or invention. Commercial should demonstrate how the invention is used, how it will benefit consumers and why they should buy it.

Theater/Drama/public speaking: The student will perform her commercial and demonstration for the class or school. Teachers, give extra credit for costumes, make-up and scenery (a free standing cardboard box backdrop and props made from recycled materials ties in well with Earth Month.)

Music: The student will compose a simple musical jingle to advertise his product. The student should emphasize that inventions are made with recycled environmentally friendly sustainable materials.

Math: The student will calculate the costs of production, establish a retail price, develop a marketing strategy and sell the product at a student "Market Day." She will keep track of sales, discounts, extra costs, etc. She will fill out a teacher-made balance sheet.

Use as many or as few of these components of the unit as you wish. You might opt to take one or two pieces and expand them to fit another lesson or activity that you are doing. These business math lesson plans and activities can be tweaked to fit almost any age of student or size of group.

Play Dough, Oobleck, Moon Sand, Lint Dough, Silly Putty recipes

March is National Reading Month. For hands-on reading lesson plans, how about homemade science recipes and kitchen chemistry experiments? Here are recipes for silly putty, noise or farting putty, Flubber, play dough, melting goop, Oobleck, Moon Sand, lint dough, modeling clay, paper mache, and soap dough.

Noise Putty, Farting putty or Flubber: Silly putty is called farting putty, because it sounds like passing gas when squished. This simple recipe has wowed generations of students in three decades of teaching. Mix blue liquid laundry starch and white school glue. Laundry starch is found in laundry section. Sta-Flo is the most common brand. Blend in cup or zippered bag with fingers. Mix till sticky glue is blended in and putty is slippery and rubbery.

Magic Melting Putty or Oobleck. This simple recipe defys the laws of matter. Mix a little water in corn starch. It hardens to a solid then "melts" when you touch it. Put melting putty in the preschool sand and water table. Or fill a child's pool with cornstarch and water for hours of messy fun. Great preschool birthday party activity!

Moldable Moon Sand. This dough recipe teaches ratios. The ratio is 2 to 1 to .5. Mix 2 cups of commercial play sand, 1 cup corn starch to one half cup of cold water (color water with food coloring if desired). Dissolve corn starch in cold water (cold doesn't clump, but you can let kids experiment with warm to discover that for themselves). The blend sand and corn starch together. Make a large batch for classroom sand table.

Perfect Play Dough: Blend 1 cup salt, 2 cups of flour, 1 cup boiling water, 1 teaspoon of cream of tartar or alum, food coloring, cooking oil (about 2 T.) Dough too sticky? Add flour. Too dry? Add water or oil.

Soap Dough: Mix 1 cup powdered laundry detergent, an eighth of a cup of water and food coloring. Mold or sculpt as you would with play-dough. Store in refrigerator.

Paper mache. Tear any recycled scrap paper in pieces. Soak in hot water till pulpy. Add a dribble of white school glue. Blend till smooth. When cool, spread over boxes and containers to form shapes. Great eco-friendly craft.

Dryer Lint Dough. Teach ratios 1.5:1:.3. Mix 1.5 cups pressed dryer lint with one cup cold water and one third cup of flour. Add a drop of oil to prevent mold. Dissolve flour in cold water and blend to get rid of lumps. Carefully add lint and stir constantly until mixture forms stiff peaks. Mold like paper mache.

Pin with Me!

Follow Me on Pinterest