Showing posts with label interactive. Show all posts

Urban Exploration, City Spelunking, a History-Lovers Dream

Warning: do not read unless you want to become instantly obsessed. We're history and travel buffs in my family. We homeschooled our four kids starting in 1995. Since I'm a hands-on kind of teacher, a get out and do gal, I taught my kids on the "I hear, I forget, I see I remember, I do, I learn" mantra. Every outing is an adventure and every adventure a lesson. 

Recently on Youtube we urban spelunking. That's where intrepid (slightly crazy) people explore defunct (or not) urban structures like regular spelunkers explore caves. Sometimes the places are abandoned, like the rocket storage facility in the Florida everglades. The documentary "Into the Darkness" touched on the discovery of a ginormous rocket left in a mine shaft in the 1960s.  The image on the left is an old, abandoned (queue spine-tingles) amusement park. While it might not be safe to explore broken down buildings, you can research the history. You can visit places with an eye to the background. Teach kids to watch for details of old architecture, sealed off rooms, basement structures, etc.

Free Printable Math Activities: Lessons, Cut and Paste, Games

Teachers and homeschool parents are always looking for ways to make learning fun. One way is to use hands-on lesson plans and interactive educational materials to engage kids in active learning. Math is sometimes difficult to teach in hands-on lesson plans. So here are free printable math games to use as math worksheets and lesson plans that are enjoyable (rather than painful). These math worksheets help students with concepts that are hard to visualize. Much math content is abstract which means kids have to "think outside the box." with no frame of reference. These free printable math games provided that concept framing. Free lessons are perfect for homeschool families living on a budget.

Dr. Mike promises hands-on lesson plans and cool math games on his website and does he ever deliver. He's created free printable math games and free printable math worksheets on an array of subjects. There are free printable games, online games, calculator games, math worksheets and board games, magic squares, times tables and more. These challenging math games cover operations (addition, subtraction, multiplication and division), fractions, patterns, cryptograms, number mazes, geometry, place value, magic hexagon, deductive reasoning. inductive reasoning, spatial relations, countdowns (using an Advent calendar) and others. Homeschool families, you will like the free printable 3D geometric solid models for kids to cut, fold and paste. How's that for hands-on lesson plans!

This articles doesn't link to individual games at Dr. Mike's request. He would like visitors to be directed back to his site. You'll be glad he did it that way. This way, you can see all the nifty math games, puzzles and activities that you may have missed had I linked you to an individual page. Printables include all pieces needed for game play. Hands-on lesson plans list items (all easy to find) that may be needed that he cannot add. Dr. Mike makes these games available free of charge for teachers, homeschool, parents, day care providers, grandparents--anyone who needs math worksheets for non-profit use.

You'll love the tessellations game and the rice and chessboard story. Read the book "One Grain of Rice: A Mathematical Folktale" by Demi. This relates the old legend of how the gift of one grain of rice grew exponentially to a kingdom full of rice in one month. Dr. Mike's games not only teach kids valuable math lessons in a manageable format, they're also a lot of fun. Teachers and homeschool parents, play these games with students and you'll hear no groans and only cheers at math time.

Free Printable Fire Prevention Week Activities and Lessons

  Fire Prevention Week runs the first full week in October. Here are fire safety printables and emergency preparedness lessons for Fire Prevention Week. Use free printable fire prevention activities, worksheets, coloring pages, stickers, games, puzzles and crafts to help kids learn vital life-saving skills. Here are free printable family activities for Fire Prevention Week. Across the country, fire fighters, public safety officers, schools, communities and families will be teaching kids about safety this October, just in time for the holiday season.

National Fire Prevention is an organization dedicated to teaching people about fire safety and fire prevention. This link takes you to the Fire Prevention Week page. Look for free printable emergency escape plans, home maps, charts, phone numbers lists, safety check-lists and other fire prevention resources. Activities are printed in English and Spanish. Check your local community fire station for details on events they may be hosting.

Print smoke alarm safety sheet, family safety checklist, smoke alarm tutorial poster, family fire escape grid route and classroom unit on fire prevention. Use for back to school science lesson plans. It's a good idea to teach a safety unit as soon as you begin classes in the fall. Educators and homeschoolers there are packets of printable information to use in lesson plans. Scroll through for grade and language appropriate lesson

Sparky the Fire Dog has his own website kids can play on. Print a Sparky origami dog. Play interactive games with Sparky, while learning important science lessons. Kids can learn fire safety in a safe, hands-on activities. They'll love the fire role play games and simulations.

One Room Schoolhouse Lesson Plans for Pioneer Day

As a teacher and home schooler, I have created a complete unit of pioneer and early American history lesson plans and activities. Here is a DIY guide to create your own "One Room School House" experience for  your students or homeschool group. 

I was fortunate to be able to rent a one room schoolhouse from our local Blandford Nature Center Interpretive history facility in Grand Rapids, MI, for our home school group. However I have also taught this unit as an in-school field trip using just my classroom. 

-Choose a time period and compile a workbook of information and activities. Familiarize yourself with that time period and be sure your activities are period correct. 

  -Create a flyer to get parents onboard with your "day in a one room schoolhouse" activity. Request volunteers to help you create an environment, share artifacts and prepare an Early America picnic lunch. Lunch should be simple: hard-boiled eggs, cheese and cornbread, pickles, apples, clam chowder, water with dipper. Serve on cloth napkin, checked tablecloth, mason jar glasses.

  -Each student should be encouraged to create an early American costume. This may be simply overalls, flannel shirts or skirt and blouse.

  -Each child should create quill a pen and a "parchment" journal to write in. Make simple journals using brown paper grocery bags for a cover. Insert several sheets of plain paper, punch holes and tie with twine. In times past, vellum was used but vellum is freakishly expensive. You can also assign students to make a hornbook. Slates were commonly used, too. Make slates by spray-painting chalkboard paint (available from any paint dealer) on square pieces of wood. Here are instructions to make natural homemade ink. Make quill pens, ink and hornbooks or journals as social studies craft projects.

-Contact local high school history classes. Request volunteer high school girl students to teach. In early American schools teachers were generally very young and female. Laura Ingalls Wilder was 15 when she earned her teaching certificate and began teaching.

-Assign each girl a subject and time slot that she will teach that subject. Popular early American school subjects included: penmanship, spelling, nature study, drawing, geography, arithmetic, civics, dictation, recitation and reading. Lesson should be simple and last no longer than 20-30 minutes. Some ideas we've used include:

--copy a proverb from from Poor Richard's Almanac
--trace one of these free printable early American maps appropriate to the time you are setting your one room school house. 
--figure sums (arithmetic
--make butter
--explore natural objects: seeds, leaves, fur pelt (natural science)
--draw a tree
--recite a poem (Samuel Taylor Coleridge "The Rime of the Ancient Mariner" or Henry Wadsworth Longfellow "The Wreck of the Hesperus" were commonly used.
--Read from McGuffey Readers
--Use early American textbooks. Common textbooks included, the McGuffey Readers series. McGuffey Readers are available online for 1836, 1869 and 1889. Spencerian Handwriting/Penmanship (1848 and 1874). Ray's Arithmetic 1834, Harvey's Grammar 1868) and History/Civics Under God. You don't need to purchase textbooks if you can borrow from your local library or historical society. 

Teachers should create a simple historical costume for the day. Local history museums or community theater guilds may have costumes to rent or borrow. The costume can be as simple as a long skirt, blouse, bonnet and shawl. The girls who participated in my one room schoolhouse events had a wonderful time preparing their lesson plans and creating their costumes. It was a great experience for all of us.

Write the schedule on a chalkboard. Begin the day with the pledge of allegiance, prayer and a song. "Good Morning to You" was a popular one. At recess children can play jump rope or one of these group games. Assign follow up social studies activities to your one room schoolhouse. Here are free printable one room schoolhouse lesson plans. 


Wood Working Activities for Preschool Learning Centers

Safe, Child Size Wood Working Learning Center for Preschool, Elementary School One of my favorite memories in kindergarten was wood shop. Here are preschool lesson plans to do woodworking in learning centers. When I was a kid, we made wood working projects with scrap wood, hammer and nails. Modern preschool learning centers can't use real tools for wood working activities for safety reasons. But some programs such as High/Scope and Montessori preschool teach children adult tasks using child-sized versions of grownup tools. Here are safe, child-sized wood working and woodshop activities for Montessori preschool learning centers

Many preschool learning centers rely on play tools for woodshop or building activities. Plastic toy tools are fun for children to play with, but they really don't teach anything practical life skills about wood working or tool safety. In fact, kids learn that it's okay to be careless when they play with toy tools because they won't get hurts. Montessori preschool woodshop learning centers educate children about safety. Any child-sized wood working learning stations should include safety glasses, work aprons to cover clothing and gloves to prevent splinters. Children should be required to wear available to wear safety equipment. Any child not behaving safely in woodshop learning centers should be removed and lose privileges.

While it mightn't be practical to use power tools, children can use small hand tools. Kids can practice hammer skill using a tack hammer, heavy plastic hammer or small wooden mallet. You can use wood and nails in learning centers with older children. Montessori preschool learning centers may substitute golf tees and recycled Styrofoam. For child-sized woodshop activities, let students pound golf tees into large pieces of Styrofoam to practice hammering. They can attach small chunks with golf tees to simulate nailing wood pieces together. Use recycled Styrofoam pieces old coolers, surfboards, packing materials, clean vegetable trays even packing peanuts.

Practice carving and cutting skills in child-sized woodshop learning centers using plastic knives and bars of soap. Older children can use child-sized saws or hack saws and pieces of balsa wood or pine. This gives students the idea of sawing wood, without the danger of injury. Children should be taught to be as careful as if they were using full-sized tools. themselves. To practice child-sized drilling activities, provide children with a non-powered hand drill, also called a bit and brace and child-sized vise. Children will love putting pieces of wood or Styrofoam in the vise to hold it secure while they work. They can practice opening and closing vise carefully so as not to pinch fingers. If your preschool learning centers have a child-sized plastic work bench, it will have play vise for children to use.

Good resources for realistic child-sized tools are Handy Andy tool kits. These were completely functional child-sized hand tools, made of realistic metal and wood, that came in a metal or wooden tool kit. Handy Andy tool kits are collectibles. Check the Ebay to buy vintage Handy Andy tool sets. 

Animal Classification Bingo Game: Animal sorting game for preschool science Lesson Plans

Interactive Animal Classification and Habitat Bingo Game for Elementary Science Class As a former Montessori teacher and homeschool mom, I'm always looking for hands-on, interactive ways to teach concepts. To explore animal classification, habitats and elementary life science and biology, I made up an animal sorting or bingo game. My children have always owned an impressive collection of stuffed and plastic animals. I put their toy animal collection to use in preschool and elementary science lesson plans. You can easily play this game with a classroom of children, or use in science learning centers. 

First, collect stuffed animals, toy animals, plastic animals and even magazines with pictures of animals. Use your National Geographic, Big Back Yard and Ranger Rick magazines. Next, make a large Bingo board on the floor with masking tape. Each square should be about 8x12 inches large. Make large signs from recycled cardboard for each category on the bingo board.

  If you are studying animal classification, you will make categories labeled:
  MAMMAL
  BIRD
  FISH
  REPTILE
  AMPHIBIAN
  INSECT

  If you are studying habitats or biomes in science, list the biomes you are exploring
  DESERT
  RAINFOREST
  EASTERN WOODLAND
  OCEAN
  WETLAND MARSH
  POND  
  SAVANNAH GRASSLAND

  Play animal bingo in one of several ways. Call out a category and let students come up and select a toy animal to place in one of the boxes under the category. You can also give each child a blank bingo sheet. For each animal in his collection, he writes a small label card. If the animal is called, he places it the correct category. You might also call categories and let him choose which, if any of the animals he has, to put in the category. The last way to play this animal bingo game (and also the most abstract and least hands-on) is to pass out animal word cards and play it that way. My students and children prefer sorting their toy animals. It was pretty cute to see Pooh bear sitting in the WOODLAND and Minnie Mouse in the MAMMAL category. This game works well for group instruction; students learn from each other and great discussion ensues.

Habitat Science Tubs and Preschool Learning Center Activities

Preschool and Elementary Science Learning Center Ideas for Habitat Study Learning occurs best when it's interactive. Bring hands-on, cross-curricular activities to every preschool classroom learning center. Studying different countries, cultures or habitats in your classroom? Here are hands-on science center activities. 

Montessori type learning centers focus on hands-on child-led mastery learning, individual work stations and play as work activities. Activities in learning centers aim for mastery learning through exploration and task completion. Montessori science learning centers are also called sensory or sensorial learning areas. Here's a system for portable exploratory science tubs with task-oriented science experiments and activities for mastery learning.

Montessori learning centers are organized, precise and minimal. Instead of a jumble of toys, there are specific ordered learning materials with task-oriented goals. Children work in individual work stations instead of desks or tables. These are usually portable mats rolled out on the floor. Portable unit-based science tubs work well. Materials in science tubs may be preset on stationary learning mats and children rotate through learning centers to complete activities. Or children may select science tubs, bring them to their mat work stations where they interact with materials to accomplish educational tasks.

To create exploratory science tubs, you'll need small plastic boxes with lids, baskets and different science unit materials. Stacking boxes or drawers in a rolling cart work well too. You might also use zippered plastic bags for individual science units. You will arrange materials by content area. When you're studying a particular content area, you'll remove materials from drawer or box and place in baskets. This makes learning materials more appealing and approachable.

Themes for exploratory science tubs include: magnets, matters, animal classification, mammals, reptiles, air, water, weather, measurement, polymers, plants, rocks and minerals, chemistry, seeds and seed carriers, feathers, electricity, atoms, food, bubbles, bugs, spiders, electronics. Place materials to explore in science tubs. Add several related follow up tasks for mastery learning--flashcards, worksheets, matching games. Children can do mastery learning tasks in science journals for follow up.

Make available tools for exploratory science: microscope, slides, magnifying glass, tweezers, magnifying box, telescope, gram balance scale, ruler, protractor, measuring tape. On the top surface of the plastic science tubs shelf, draw outlines of tools so children know where to place tools when finished. You could also make a pegboard for them to hang tools. Children perform exploratory science tasks and then return materials to original places so other children can use them

Back to School DIY Science Nature Detective Kit

Back to School Science Kickoff Activities: DIY Nature Detective Kit Welcome kids back to school with science exploration kick off activities. Make easy inexpensive individual nature detective kits. 

Looking for summer camp kids' activities? Here's a nature science lesson plan. Make nature detective kits to explore wildlife science concepts. Use this activity to welcome kids back to school. Kids will love playing nature CSI! Homeschooling parents will love this inexpensive, hands-on science lesson.

You will need one of each of these items per student:

--large gallon size zipper bag or cheap carry-all bag to store supplies

--plastic magnifying glass (available in bulk at Great Party, Party America or Oriental Trading)

--cheap one-subject notebook

--pocket folder ($.05 -$.15 each from Walmart, Staples, Target)

--plastic disposable gloves (choose latex free; give each student one pair)

--tweezers or cotton swabs (both would be useful, but use cotton swabs to save money)

--3 or 4 specimen bags (snack size Zip-Loc)

--3-4 larger specimen bags (sandwich size Zip-loc)

--sheet of label stickers

--pen and pencil

-- roll of invisible Scotch tape

--several pieces of yarn or string

--box of crayons ($.25 at back-to-school sales)

--measuring tape (here's a free printable measuring tape)

How to Use Nature Detective Kits:

Make kit assembly part of the lesson. Set out supplies in stations and give students gallon zipper bag and supplies list. This provides experience in counting, sorting and organizing.

Using stickers, kids label notebook: Investigator (name)____________ or Detective (name)____________. Label bags: Exhibit A, B, C or Evidence. As evidence is collected, data and date should be added. For example: 'beetle exoskeleton 9-3-2015.

Go on nature investigation hunts around your neighborhood, school playground or camp. Assign students different items to investigate, native to your area. Students should not keep living specimens, but they might bring a bug box to temporarily house and examine a living critter. Look for evidence of living creatures: bug carcasses, exoskeletons, fallen leaves, feathers, owl pellets, seed pods, rocks, fallen nest, bits of animal fur, bark samples, plants, flowers and rocks.

Have students draw living creatures, homes and habitats: spider's web, bird's nest, wasp's nest, rabbit hole, ant hill, scat (animal droppings). Students should record when and where they observed it. Students shouldn't touch but may observe scat(animal droppings) or dead animal remains.

In class, have children discuss and hypothesize on findings at their level of reasoning. Students might create a natural history museum displaying what they have found. Students can act as young docent guides, explaining discoveries to visitors. This makes a superb activity for parent-teacher conferences, which come early in the year before teachers have had time to collect much student work. It's ideal for summer camp, too. 

DIY Preschool Classroom Learning Centers: Sand and Water Table Ideas

The sand table, also called the water table or sand and water table, is a staple in preschool learning centers,  early childhood special education and kindergarten classrooms. The sand table is a hollowed out table that can be filled with sand and/ or water for interactive play. Here are diy water table ideas for preschool, day care, homeschool, Montessori, kindergarten and any exploratory classroom environment. The water table is an important part learning centers based classrooms. The sand table provides tactile stimulation, interactive hands-on exploration and play therapy for special education and early childhood development. It fosters perceptual and cognitive development in special education students. It helps with special education occupational therapy.

You can purchase a sand table or make homemade one using one of these alternatives: dish pan, recycled plastic laundry soap bucket, shallow plastic covered storage bin, inflatable child's swimming pool, small hard plastic swimming pool or covered Little Tikes Turtle sandbox. I have used all of these as a DIY water table in my teaching career. The nice thing about using a smaller water table is that it's portable. If you choose a covered container for a sand table you can store in when not in use. The Little Tikes Turtle sandbox makes a particularly nice sand table as you can use it indoors and outdoors, as a pool or sandbox.

In the summer weather, take the Turtle sandbox outside for outdoor learning centers. In the cold, wet winter months, bring the sandbox inside and set up in your special education and preschool classroom learning centers. Cover the floor with an old recycled plastic shower curtain or tablecloth for easy clean up. Set a little broom and dust pan nearby so that children can sweep up sand and replace in sand table. This is good housekeeping practice for the house or practical life learning centers.

Preschool Sand Table Lesson Plans for science learning centers

A sand table is a low child-sized table with tubs that can be filled with materials for children to explore. The sand table, also called sand and water table, is the backbone of preschool science activities in learning centers. Early childhood special education classrooms use a sand table, or water table. The sand table provides hands-on,interactive learning, cognitive and perceptual development and tactile stimulation. You can make your own sand table for preschool learning centers. Then use these sand table science activities for early childhood lesson plans.

Water: Fill tubs with water to make a water table. Add floating toys and bath tub toys. Provide different sized containers that encourage children to practice pouring and measuring. Place revolving water wheels in the water table. Add some items that sink and some that float. Use water table for hands-on exploration with the scientific concepts of flotation, water displacement, density and specific gravity. Create a "What Sinks? What Floats?" chart.

Bubbles: Make a simple bubble solution with water, lemon Joy dish soap and glycerin for sturdy
bubbles. Add bubble making toys and every day household gadgets: apple corer, egg beater, whisk,
egg slicer, slotted spoon, fork, cone shaped applesauce mill and any other safe gadgets for water
science activities in learning centers.

Rocks and seashells: Fill your sand table with water and sand. Add rocks, seashells and old (sanitized)
recycled toothbrushes. Children can scrub shells and rocks with toothbrushes. Shells and rocks are
best seen in water, which brings out their hidden depths. Children will love exploring the intricate
beauty of shells and rocks.

Shaving Cream: Allow children to squirt shaving cream into water table tub. Concentrated gel shaving
cream is lots of fun because it foams up as it sprays. Teach safety so kids don't get soap in their eyes.
Exercise caution with aerosol cans. It may be advisable to have an adult add the shaving cream.
Encourage finger painting and drawing in shaving cream. Make sure children wash their hands after
doing science activities in learning centers.

Snow: Fill the sand table with snow and add plastic sand shovels, trowel, ice cream scoop, melon
baller, recycled plastic cups and containers for molding and shaping snow. Have children to wear
gloves and keep several pairs near the water table.

Recycle bin paper scraps: Place scrap paper in sand table tubs and add scissor with patterned edges
and paper punches. Children love to snip, trim, cut and punch paper. Exploring with paper in the sand
table keeps scraps in one place. This exercise provides good practice in cutting skills, scissors skills,
eye-hand coordination and fine motor skills.

Dried beans or rice: Add plastic measuring cups, spoons and cups with pour spouts. Teach children
about measurement math. Preschool children can practice counting, sorting while getting good tactile
stimulation in learning centers.

Aquarium Fish tank rocks: Buy bags of multicolored aquarium fish tank rocks (the small kind that line
the bottom of the tank). Fish tank rocks make excellent media for pouring, scooping and measuring.
Aquarium rocks also don't draw insects like beans and rice. Beads work well in the sand table, too,
but can be expensive. Explore other materials for your sand table science activities.

American History Lesson Plans: 3 Branches of Government


Some American government lessons are easier to teach than others. The three branches of government, with its system of checks and balances can be tricky to explain. So here are free printable American government lessons with objects lessons to help kids understand. To understand checks and balances and three branches of government, imagine a table or stool resting on three equal legs. The three legs are the three branches. Each of the three legs has equal strength and equal responsibility for holding the table straight. Each of the three branches of government (three legs) has its own functions and all three have equal power--each checks and balances the other. Each checks the other two make sure neither becomes to powerful and balances the others in carrying its fair share. 

Use these free printable American government lesson plans to explain that the three branches of government are-- the Judicial, Legislative and the Executive Branches. Each of the three branches of government has its own functions and all three have equal power. The Executive Branch includes the President of the United States, Vice-President and the Presidential Cabinet, which has 15 departments. The Executive Branch carries out laws. The president can veto laws also and appoints judges. The head of each department is called a Secretary, except for the Department of Justice whose head is called the Attorney General. 

These are the Presidential Cabinet departments. Department of State- international relations with other countries, Treasury, Defense, Justice, Department of the Interior - wildlife and natural resources, Agriculture, Health and Human Services, Labor, Urban Development, Commerce, Transportation, Energy, Education, Veterans' Affairs, Homeland Security 

The Legislative Branch: This branch, also called Congress checks and balances by making laws. The Legislative Branch has two branches--the Senate has 100 senators, two from each state. The House of Representatives has 435 members. Each state gets a certain number of representatives depending upon state population. For a bill (suggested law) to become a law it must be approved by both houses. The Judicial Branch: This branch includes judges and the court system. 

The Judicial Branch checks and balances the others by interpreting or examining and explaining the laws and Constitution. The courts decide how laws should applied in different cases. The Supreme Court decides the most important cases

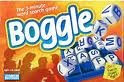
DIY Scrabble/ Boggle Letter Dice for Word Games

To make your own Scrabble or Boggle dice, you'll need 12 dice: Recycle die from old games with lost pieces. Look for old dice games like Kismet or Yahtzee at garage sales. Ask a handy man to cut small dice cubes from scrap wood. Dice can be purchased at almost any store for under $2).
Permanent markers
Blank stickers (round or square white stickers are best)
Note pad
small pencils
watch or timer
small box

To make Scrabble/Boggle dice
Affix a sticker to each of the six sides of the die.
Label each die side with a different letter. With 12 dice times six sides you will have room for 72 letters. Since some letters are more popular, label dice this way. It makes no difference where on the dice you put which letters, Just be sure to get this many letters in.
  -four times each, letters: A, E, I, O, U, R, S, T, L, N
  -three times each letters: B, C, D, F, G, H, M, P
  -one time each, letters: J, K, Q, V, W, X, Y, Z
  -dictionary to check spelling

Hands-on Geography Social Studies Earth Science Lessons and Games Using Globes

April is Earth Month and it's a good time to explore earth science and world geography. With the National Geography Bee right around the corner, here are hands-on social studies lessons, map activities and geography games with globes. Playing geography games with globes helps students visualize the big picture better than with maps. Use map activities to locate specific places and use globes for accurate place countries in the world at large. Use geography games with globes to demonstrate earth science lessons, just in time for Earth Month in April!

Race Around the World map activities: Divide students into teams of 2-4. Give each team a globe and attach a world map to the wall or bulletin board. Call out countries, cities and provinces for teams to locate their globes. The first team to find the location wins a point. After the location is found indicate it on the wall map with a pin or sticky note arrow (available at most office supply retailers).

Earth Science Jeopardy: Students may play individually or in teams. Draw a Jeopardy grid on a Dry-Erase board, overhead projector or chalkboard. Label five categories across the top of the Earth Science Jeopardy board. Here are some suggested earth science categories: Rivers, Mountain Ranges, Africa, Asia, Islands, Europe, United States, South America, Bodies of Water, Northern Hemisphere, Locations that begin with ____ (fill in letter). Fill in dollar amounts as in regular Jeopardy. Players select a category and value. The geography games leader calls out a place and team members must locate it on globes. Give teams buzzers or bells to sound when they find the answer.

Latitude and Longitude Hide 'n Seek map activities: Explain the how lines and degrees of latitude and longitude work. Official latitude lines--also called parallels--go east to west and longitude lines go north and south. There are 180 latitude lines--90 above the equator (north) and 90 below (south). There are 360 lines of longitude (180 in the eastern hemisphere and 180 in the western hemisphere). They are divided into 24 groups which define time zones as well as geographical locations. Use coordinate geometry to place cities and landforms in lines of latitude and longitude. Ask students to list different earth science landforms located with the latitude and longitude markings. Ask students list cities and locales based on latitude and longitude coordinates or bearings.

Time zones bingo map activities: Using the small dial attached to the top of the globe, teach students how read lines of longitude to determine time zone. Call out a time zone. Students fill their card by locating and listing a city or province in that time zone. Require older students to calculate what time it is in different countries by giving the time in another time zone. Explain the Greenwich Mean Time system.


Marketing, Business, Math Lesson Plans with Manufacturer's Marketplace

In my never-ending quest to make learning more hands-on and content more approachable, here is a school activity that combines business and money math, writing, design, marketing, public relations and organization: it's called Manufacturer's Marketplace. If you want to engage your students in active learning and create a memorable lesson plan that everyone will enjoy then Manufacturer's Marketplace is the venue for you.

  The concept behind a Manufacturer's Marketplace is quite simple. Each student must design and produce a good or service, which he vends to his school community on a given school day. All that is needed from the teacher's perspective is a time, place and student body. Manufacturer's Marketplace can be held in any grade; in school districts in which children enter middle school in sixth grade, Manufacturer's Marketplace makes a great 'farewell to fifth grade and elementary school' project'.

  To organize Manufacturer's Marketplace with your students or homeschool cooperative, each child should be given a planning sheet to fill out with parents, explaining what good or service he plans to market, his costs involved and his final price per unit. Goods should be made by hand and not purchased. Students should draw a model of their product or service as well as an advertising poster to be hung in the school hallway. Cost per product should be kept under $1.00 per unit so that student's with little pocket money can still purchase something. As a class, students should create a take-home flyer to be sent home with students in all grades, reminding students to bring money for Manufacturer's Marketplace Day.

  On Manufacturer's Marketplace Day, students should set up their product on individual desks or tables. Part of the assignment is to create enough product to supply the number of students in the school. Recommend that students bring at least one unit for every three - five students in the school. An important part of this marketing assignment that students will learn is about supply and demand. Classrooms of students should be given slots of time to browse and shop.

  After Manufacturer's Marketplace Day, the student should calculate profit, any discounts they may have given, any hidden costs incurred as well as any leftover product (to be deducted from the sales as a business liability). Students should also write a brief business report analyzing the project, listing successes as well as changes that they would make next time (bought too little, over-bought, etc.).

Manufacturer's Marketplace is a great math, business, book-keeping, design, entrepreneurial, marketing and social event for your school.

Free Botany Lesson Plans--Plant Science-Roots and Stems


Biology science activities naturally focus on living things. Teach students about botany and plant biology in spring science activities. As students watch nature awakening all around, they observe plant biology and plant structure--seeds, roots, stems, buds, leaves, flowers and fruit--first hand. Teach kids about botany for Earth Month in April. In May and June, students can explore flowers and more mature plant structure. Here are links and websites with hundreds of free printable spring science activities on botany, plants, trees, plant biology and flowers. Get free printable spring science coloring pages, worksheets, charts and diagrams.

The Teacher's Corner has free printable biology science activities and botany lesson plans. Plants and trees cover enormous area to study that you will want to check out these websites and see which have materials specific to what you need. Activities cover edible plants, medicinal plants, toxic and unsafe plants, plant biology, finding and naming plants native to your area, biomes and much more. Visit Enchanted Learning's science homepage for general biology, spring science activities andfree printable lesson plans on trees, plants, botany and plant biology.

Lesson Plans Central has free printable science lesson plans and spring science activities. Instead of linking to the page on plants, visit the general science activities page for more extended spring science lesson plans. Edupics is always a superior internet resource for free printable realistic coloring pages. Edupics has many coloring pages of trees, plants and botany coloring pages for spring science. Primary Games has lots of free printable flowers and plants coloring pages. Biology Junction 

Green Earth Lesson Plans: Dr. Seuss The Lorax


Dr. Seuss celebrates his birthday on March 2. We celebrate Seuss in March with National Reading Month and Read Across America. For good Seuss fun, why not read "Bartholomew and the Oobleck" and make oobleck What's Oobleck? It's Seuss for Goop-Slime-Silly Putty-Gak Splat-Flubber. Those are commercial names. But you can make your own. 

But watch out. Oobleck has a mind of its own as Bartholomew finds out (he's the lad who had hat trouble in Seuss's 500 Hats of Bartholomew Cubbins.") Here are oobleck recipes. Stretchy, noise putty Oobleck (fondly referred to by kids as "farting" putty.) Mix in zippered plastic bag, equal parts liquid laundry starch and white school glue. Liquid laundry starch is located with laundry supplies. A common brand is Sta-Flo. It's a light blue milky substance. Mix with fingers till glue is blended in and there is no tackiness. Kneading makes Oobleck rubbery and bouncy. Galactic glitter Oobleck. Give Oobleck a glam makeover. Add a little glitter to the noise putty recipe. This is the same recipe for Silly Putty or Flubber. Keep fresh in refrigerator stored in plastic bag. Glow in the Dark Oobleck. Make Halloween Oobleck by adding a little glow powder or luminescent fact paint to the Oobleck. Take it outdoors or shine a black light on it. Mystery oozing Oobleck: Blend small amounts of water in powdered cornstarch. The Oobleck moves back and forth between liquid and solid states of matter. It "melts" with warmth of your hands hardens as it cools. Touch and it melts. Like Bartholomew's oobleck it seems to have a life of its own. Mix directly on a table. Spills dry and vacuum up easily. Here are more science recipes and homemade art supplies made f

Household Chemistry Activities, kitchen science lesson plans


You can create a complete semester of science lesson plans and chemistry experiments with this shopping list of school supplies from your local pharmacy. Normal science classroom safety precautions should be taken. 

Ph test strips or Litmus paper. Use these to test the base or alkaline vs. acid level in products. Find them with diabetic supplies or in school supply catalogs. Or make your own litmus paper using this guide from Owlcation. You'll need blotting paper available from Amazon. Here is a litmus paper color chart to indicate acid or alkaline (base). 

 
Assorted vitamins and pain relievers:  Give each student a label from different medicines and vitamin bottles. Have them analyze the ingredients for additives, active ingredients, composition, dyes, etc. Students can also evaluate safety, effectiveness, proper usage, etc. Students should compile a medicine safety booklet.

Pill solubility chemistry experiments. Demonstrate how long it takes various pills to dissolve and enter the bloodstream. Students should note findings in science journals. 

Medicines in water source chemistry experiments. Extend pill solubility lesson plans into an ecology lesson by allowing the water to evaporate. Note any remnants of the pills. Explain how flushed pills and medications enter our environment via sewer systems and are spread to rivers, lakes and streams. Via the water cycle, they enter the atmosphere.  

Glycerin science experiments: Glycerin is basically biodiesel fuel. It has a sweet taste and it used to coat pills to make them taste better and easier to swallow. Debate with students the advisability of using an alcohol based product for ingested products. This thick liquid can also be used to demonstrate viscosity of liquids. Demonstrate it by adding it to dish soap and water to make super sturdy bubbles.

Soap chemistry lesson plans. Compare ingredients with commercial soap brands which claim to be pure and gentle. Ivory, Dove, Caress to castile soap and other natural soaps. Compare ingredients in stronger soaps like Irish Spring, Lava and Fels Naphtha. Use ph strips to test acid or alkaline (base). 

Epsom Salts. Here's a complete unit of science activities using epsom salts and other household chemistry supplies. Here are more epsom salts science experiments and craft projects to make crystals, salt, ice, a salt pendulum and more. 

Lotions and creams. Use Ph strips to test acidity levels in these creams. Students will be surprised to discover that products that are supposed to soothe and protect often contain very harsh drying chemicals like petroleum or alcohol. 

Isopropyl Alcohol: Have fun with this non-Newtonian liquid. That's one that doesn't follow the laws of physics. Rubbing alcohol is used to dry up or evaporate other liquids. Hand sanitizer is a great example as it dries quickly. Alcohol is used for swimmer's ear to keep the ear from holding water and to dry it quickly. In fact consumed, beer, wine or liquor alcohol dehydrates the body. 

Hand sanitizer. With Covid 19, we're using more antibacterial hand sanitizer. Demonstrate to students that while it kills bad germs it's also dangerous because it kills all bacteria, even good bacteria. It's also somewhat flammable. 

Iodine. Iodine has disinfectant and anti-puritic capabilities. It is yellow in color, but will turn deep purple in the presence of a starch (bread, potato, etc.). Iodine can be used in numerous science lesson plans on anatomy, biology, nutrition, chemistry and health.

Hydrogen Peroxide. Women used to "bleach" their hair with peroxide. Use to demonstrate whitening properties by pouring on a lock of cut hair. Use peroxide toothpaste to show how it removes stains from teeth. Remove stains from clothing with peroxide. It is the base of oxy cleaners. It will also foam up when applied to a cut, to clean away dirt. Benzoil Peroxide cleans out pores. Hospitals use betadine now instead of peroxide. 

Syringes. Use to demonstrate a vacuum. Teach measurement and use to add drops of liquid. 

Pin with Me!

Follow Me on Pinterest